Website powered by

Robot Arm - Update 15

General / 22 March 2021

Textures!

I am now going through the lookdev process of material development. For this project, I am using Marmoset Toolbag 4 for all of the texturing. I like having the ability to author in the program I'll be rendering in. Also, being able to move objects around in the scene is really handy to get those hard to reach spots and see how things look when posed. 

At the moment, I'm really sinking a lot of time into getting this "heavy paint on cast metal" look down. Some examples of that here:


In the last image, you can see paint buildup over the unfinished machined edges. If you have ever used Dynamesh in ZBrush with a boolean workflow, this might look familiar. It's the artifacting you get when you use the relax deformer on sharp edges and it's usually not desirable. However in this case, it was perfect for simulating that paint "lip". 

Today I started experimenting with more targeted paint artifacting with bare and recoated chipping:

And some additional material tests from this past week:

Shoutout to Kelly Cline for encouraging me to go far beyond my original texturing goal for this project. 


Report

Robot Arm - Update 13+

General / 01 January 2021

I realized I haven't updated my blog in forever as I've been posting updates to this project on twitter. Guess I better give this blog some love, too.

All of the low poly for the main body has been completed with base materials applied, fully textured in Marmoset Toolbag 4. I am just now starting to place the cables. So close to the finish line! 

TLDR; Here's some eye candy


Report

Robot Arm - Update 11

General / 15 April 2020

I replaced the servos on the U Axis (bottom left) with a new type just to keep it interesting. Also started on the hose connections on the U Axis bracket.


More Meshfusion operands. I had to hide a lot of the cutters because it was just a confusing mess of wireframes. But yeah, this is how I model pretty much everything nowadays. Live, non-destructive smooth booleans is where it's at.
  

Report

Robot Arm - Update 10

General / 04 April 2020

This is a verrrrry belated update. I've been posting more frequent updates on my twitter account, but here is a compilation of all of the stuff I've done on this project since the last blog update, in no particular order:

B Axis


  Mesh Fusion!


  R Axis (looks like a gnarly electric toothbrush head)


  U Axis + Reducer


  U Axis + Servo Motors


  S and L Axis with servo, bolts, clamps, brackets, and placeholder hose


Fun times. Also, I started this project nearly 11 months ago. Wanted to do other things more times than I can count, but I'm sticking this out for however long it takes to at least make a baked mid poly. Would be a good stopping point. That way I could texture it all later when I have a fresh mind about it.

Report

Robot Arm - Update 9

General / 21 January 2020

EDIT: I did eventually go back to this and get it done with MeshFusion for a full do over. Order of operations makes a huuuuge difference.


There's something about the boolean/dynamesh workflow that feels dirty to me. I know it's fairly common now, but the last time I felt like I had to resort to it was back in 2013 with ZBrush 4r6. 99% of the time, I feel MeshFusion can do all I need. So of course, this part happened to be that rare 1%. There were just too many insane intersections on this axis. I probably could have gotten it with some extreme order of operation planning but... meh.

Manual retopo, here I come. I hope this was worth it.


Report

Burnout Is Currently Not A Thing

General / 06 December 2019

Since writing my last post, the 3 months in between have been a flurry of activity. I was, somewhat unexpectedly, forced wayyy out of my rut and into the stratosphere. Literally. That is to say work sent me on multiple reference gathering trips across the country. Fort Walton Beach, FL. Tuscon, AZ. Columbus, GA. 

And boy, what an experience. Played with the IR camera on a military plane at night. Sat in the cockpit of an A-10 and giggled with glee as they turned on the instruments. Had lunch on top of an Abrams tank. Wanged my head on the inside of said tank. Had way too much fun doing all of the above and had to pinch myself to think that I get to do all this as a work-from-home 3D artist. Batshit crazy.

And then, in the midst of all of this, I have been transitioning to a Lead Artist role within the company after realizing that's where I see myself heading. I happen to greatly enjoy logistics, document-writing, managing, and big picture stuff just as much as I love modeling. Has been interesting times.

Also during all of this, I had taken up mentoring a prior 3D artist who applied for a job with us. He didn't quite make the cut but we gave him feedback on his portfolio. And wouldn't you know it, he made changes to his portfolio based on that feedback and reapplied a couple weeks later! We liked his determination. But he still wasn't good enough. I took it upon myself (with my boss's approval) to give in-depth feedback and eventually mentor the guy in my free time. After 3 months of that, the team agreed he was good enough and he is now a new member of the Vertex Art Team! :D (can't say who yet, for reasons)

So as a result of all of that, it allowed my brain to think of non-modeling tasks which then led me to be able to make a push on 3D personal projects. Like the robot arm thinger. Made progress last night, with a lot more work left to do. But it's work I am now excited to be doing again. 

My only lament is that I no longer have time to work on my trunk restoration project :( Life of a scatterbrain...


Report

Burnout Is A Thing

General / 31 August 2019

And it happens. This is the first time In... 7 years. And while it wasn't even work-induced, it has affected my work. Just life being overly chaotic/stressful. So even while the burnout wasn't a result of modeling too much, I have taken a break to work on some more analog projects. 

Story time!

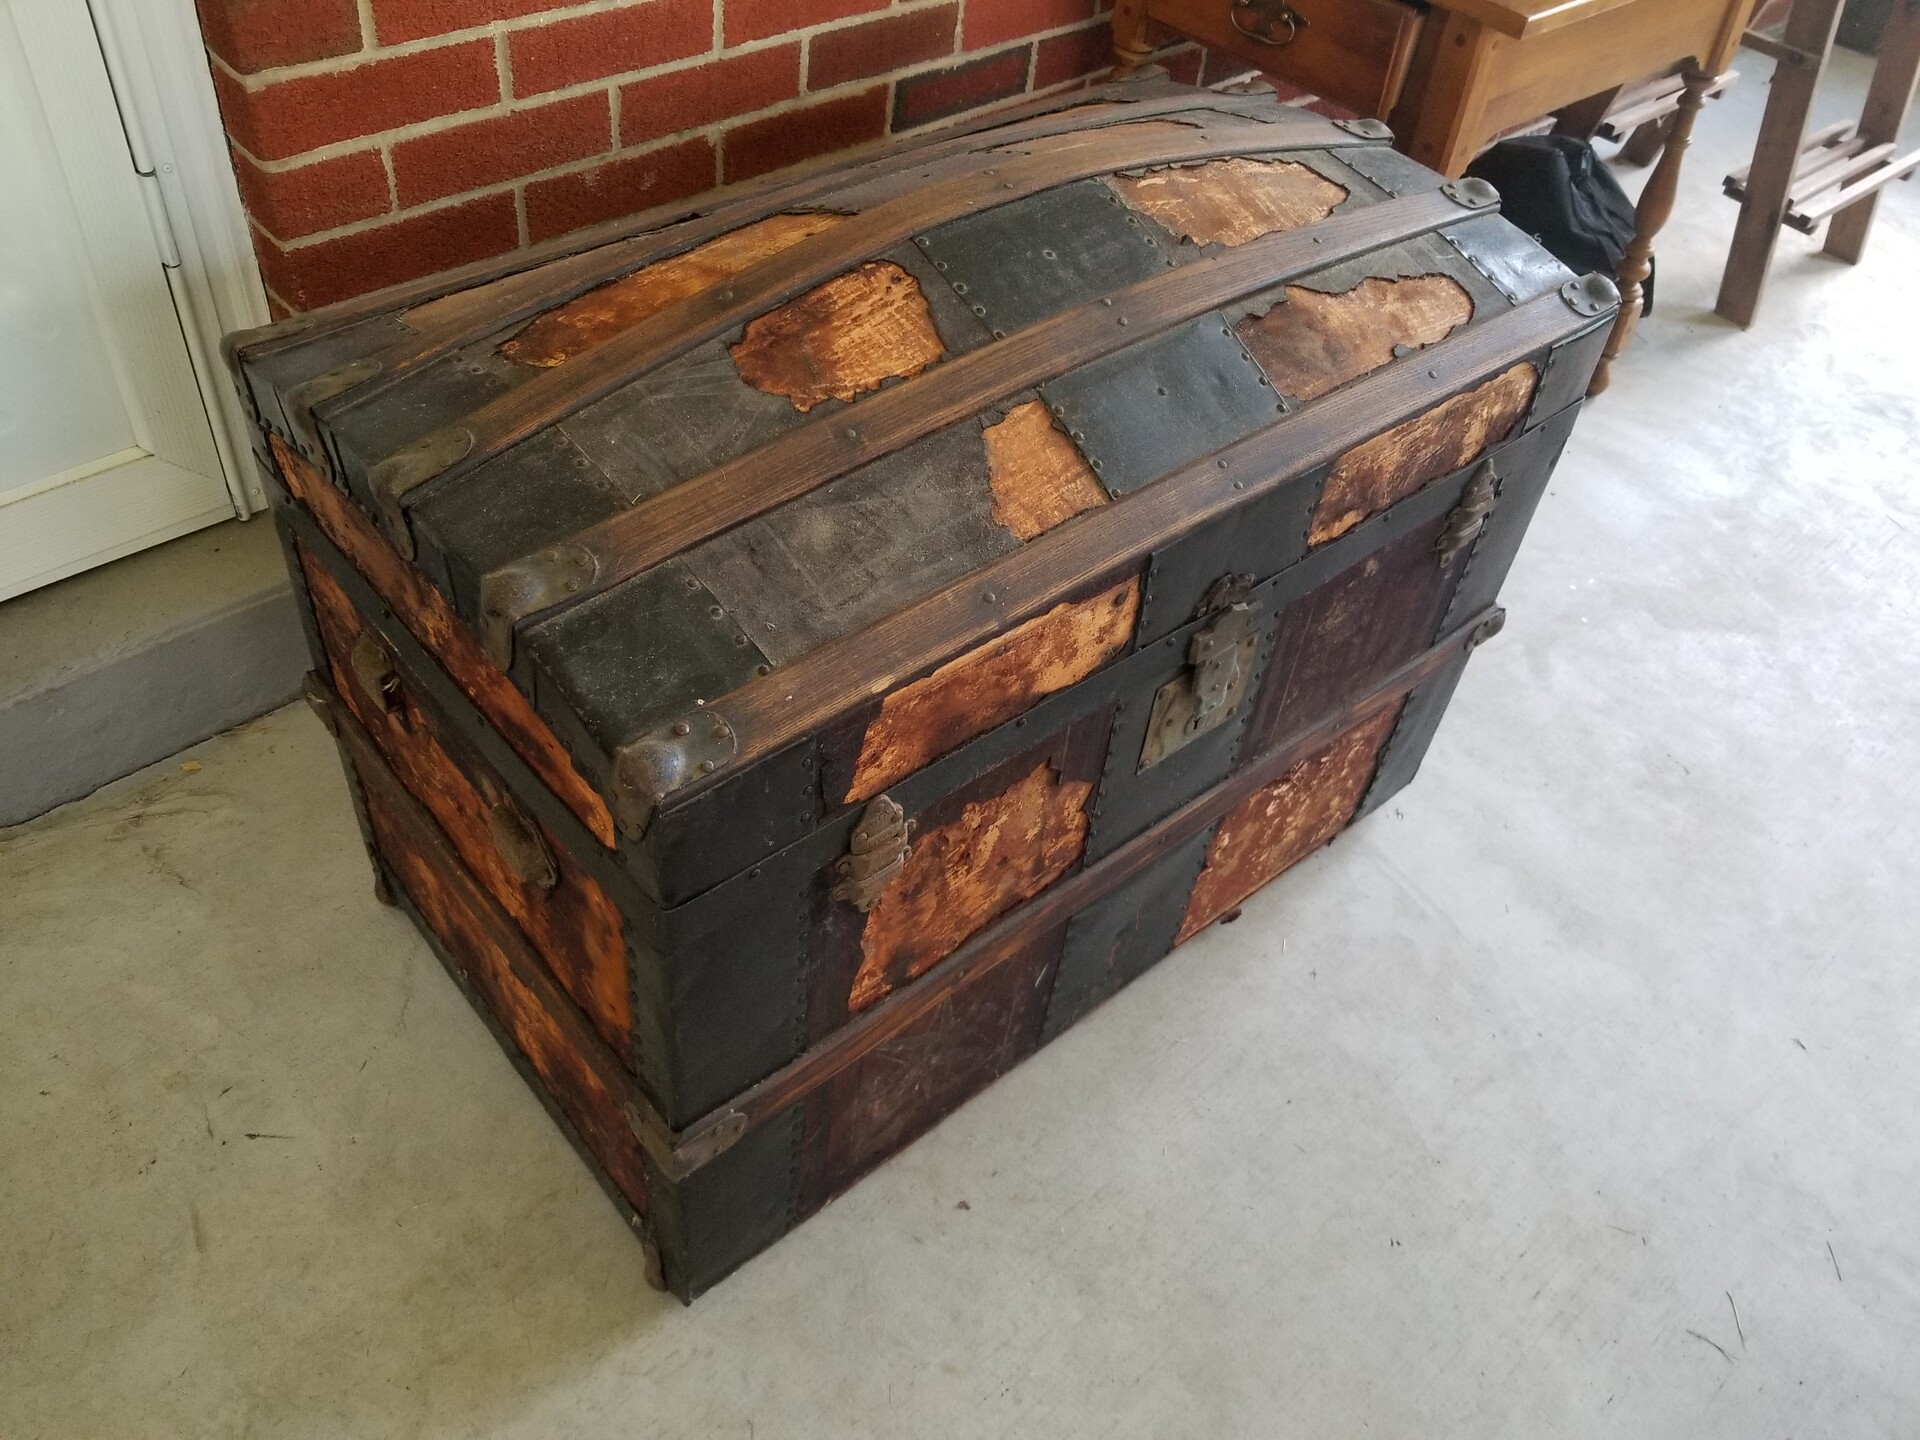
About 20 years ago (I was 15 at the time), I found this old beat up steamer trunk someone was throwing away in my parent's neighborhood. I dragged it a few blocks back home expecting to do amazing things with it. Of course, other than using it to pretend to be a pirate on various occasions, it mostly ended up sitting alone stored in my parent's shed. 

Eventually I had moved out and every once in awhile, my parents would ask if I still wanted the chest, and every time I would insist they keep it. Now finally, 20 years later, I feel like I have the experience, funds, and am in the best point in my life to do something about it. So I hit up Harbor Freight, got a ton of tools for super cheap, and am restoring this sucker.

 I used a utility knife, putty scraper and chisel the got the rock hard leather off the top. Didn't want to remove the ribbing just yet. Not until I'm sure I can fill the gaps that removing the leather underneath would create.

I am going to be removing the rust off the metal bits with a softer wire brush. But I don't want to polish out the patina or pitting.

I did some sleuthing with a magnifying glass and discovered this chest was made in 1836. It's also missing the internal shelf, so I might try to test my carpentry skills with that when I finish.


The best way to deal with burnout is to just start doing things. Doesn't matter what, just that you do it.

Report

Robot Arm - Weekend Update 6

General / 17 August 2019

It's been awhile since I posted an update. Work has been completely busy and awesome, but it takes a toll, mentally. So here I am trying to keep myself accountable to my personal work and posting what I have. Troubleshooting some MeshFusion bugs can also be aggravating. I think I know what the issue is, and fixing it is another can of worms. But progress is progress.


Report

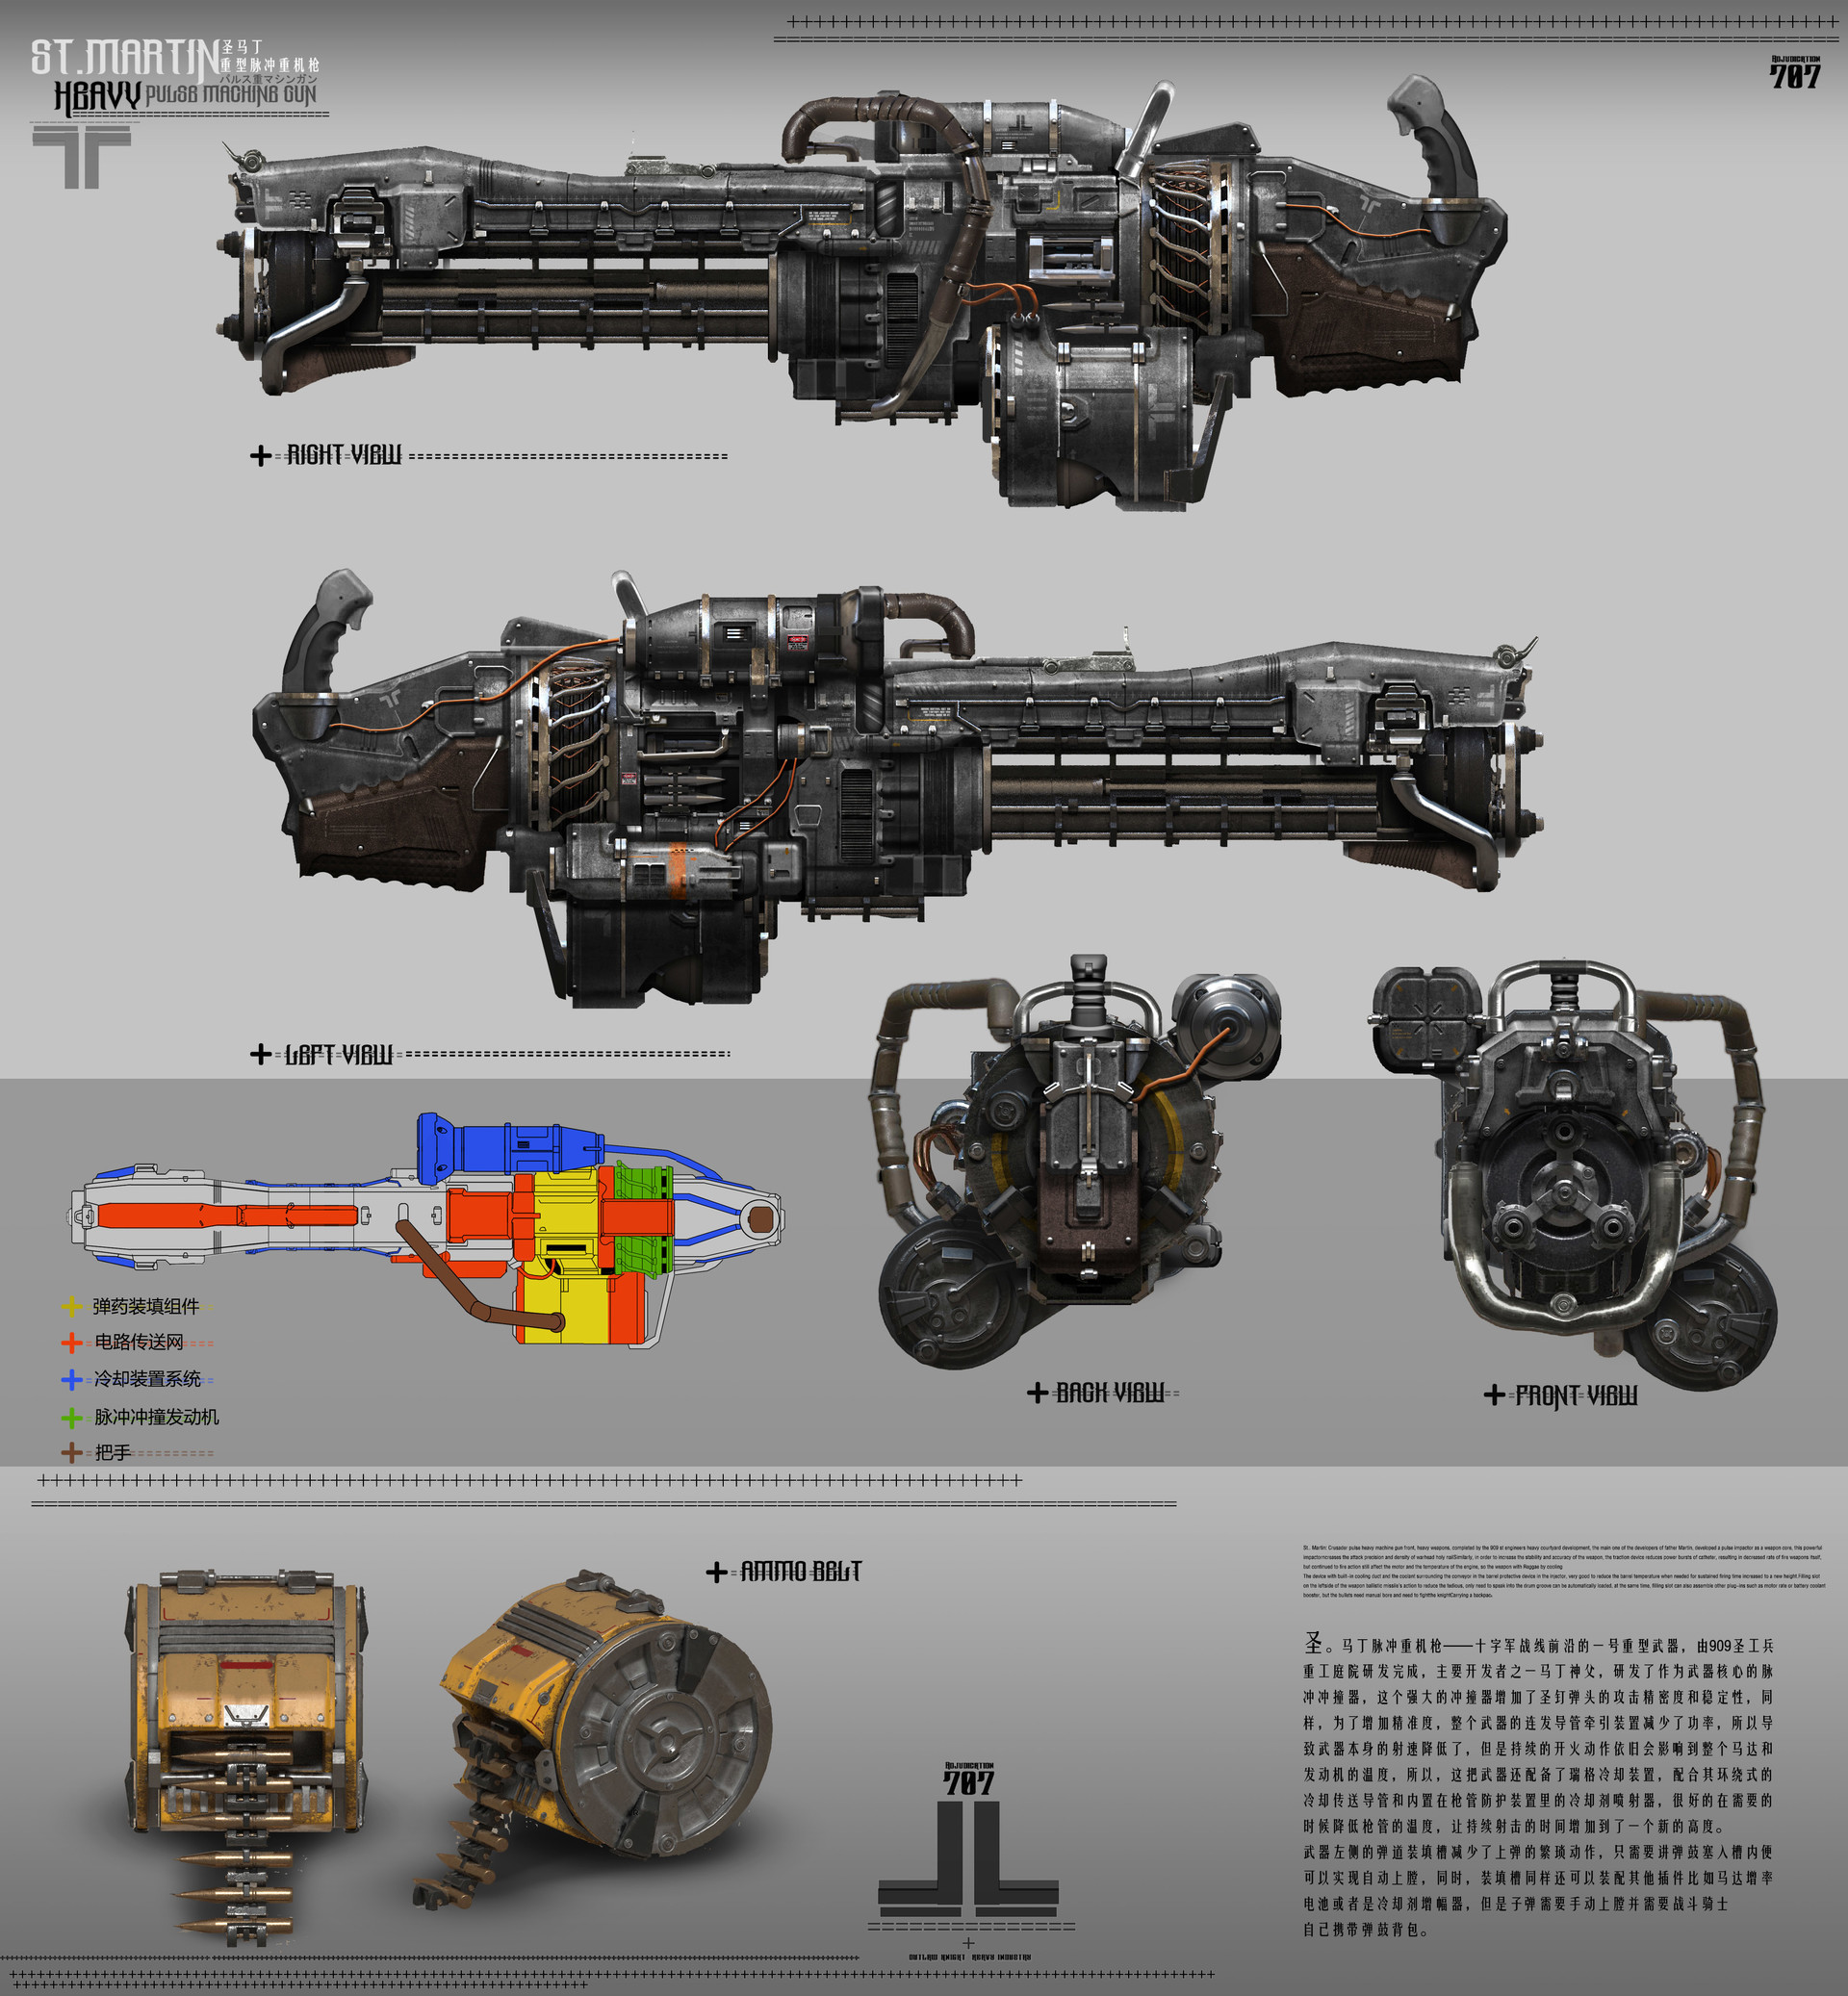
Next Project - Heavy Pulse Machine Gun (On Hold)

General / 22 January 2019

I've modeled tons of weapons lately but none have been of the "heavy" variety yet. So I'm looking to change that for my latest project with this amazing concept by Weiyi Qin:

https://www.artstation.com/artwork/zB52d


Naturally, I will be doing this with the same fidelity, if not more so, as my tactical caulking gun. For those who don't know, I model detailed weapon and machine assemblies for a living. High detail is my bread and butter.

I have also officially transitioned to using Modo's MeshFusion tool set as my primary modeling method. I was more or less "beta testing" the workflow with the caulking gun, and after using it extensively in a game dev production setting over the past 6-8 months, I've now adopted it full time with no regrets. Maybe one of these days I'll get off my bum and make a crash course tutorial for MeshFusion. 

I don't have any more to say so here we go!

Report

MeshFusion in MODO

General / 25 May 2018

I started this caulking gun project primarily to try to see how well I was able to fit MeshFusion into my workflow. MF certainly has its quirks, but as a dynamic/live boolean tool, it's surprisingly versatile. It took some time to learn how to mitigate weirdness and artifacts, but I think I'm finally at a point where I'm becoming comfortable and efficient with it. I started and finished the vertical foregrip this morning before work, and it took me 1.5 hours. 

The biggest issue I had was getting the cuts into the knurling on the grip. It's really twitchy with varied and dense topology so you have to move the cuts in small increments in various directions until the cut stops freaking out. However, when you do get it, it's very rewarding because now you have an all quad transition. This is what makes MF so much more powerful over other boolean solutions. It's not a nightmare to retopo.

After this project is finished, I'll be making a tutorial on how I retopologize my MF models quickly.


Report